第三方的教程传送门
https://segmentfault.com/a/1190000004558796
karma
# githubhttps://github.com/karma-runner/karma# 安装http://karma-runner.github.io/1.0/intro/installation.html# 入门http://karma-runner.github.io/1.0/intro/configuration.html
安装
# 命令行工具cnpm install -g karma-cli# 核心cnpm install karma --save-dev# 其他可能用到的插件cnpm install karma-jasmine karma-chrome-launcher jasmine-core --save-dev
使用<系统cmd>敲打以下命令;
使用<系统cmd>敲打以下命令;
使用<系统cmd>敲打以下命令;
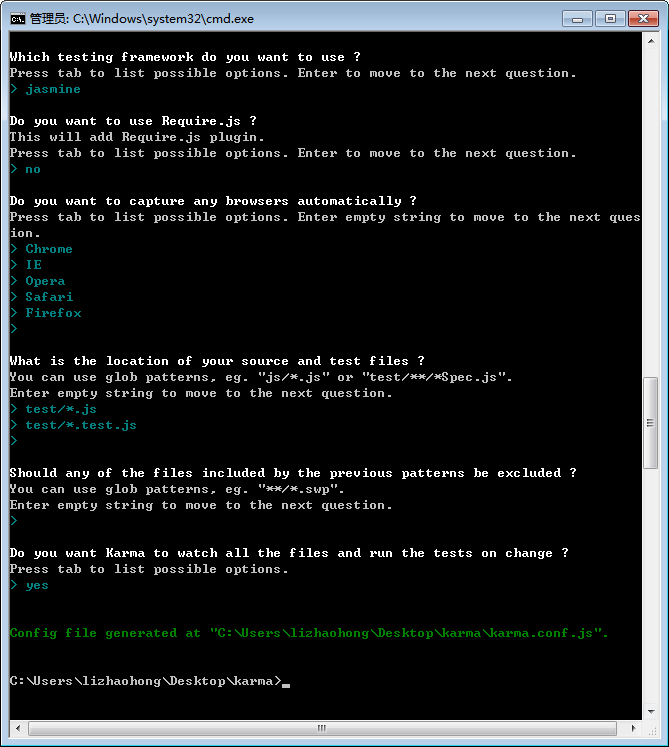
# 新建一个test目录 mkdir test # 初始化karma配置. 文件名自定义,如my.conf.js也可以,然后根据下图个性化配置 karma init karma.conf.js

运行以下命令,查看惊艳的效果吧!
karma start karma.conf.js
phantomjs
PhantomJS 是一个基于 WebKit 的服务器端 JavaScript API。它全面支持web而不需浏览器支持,其快速,原生支持各种Web标准: DOM 处理, CSS 选择器, JSON, Canvas, 和 SVG。 PhantomJS 可以用于 页面自动化 , 网络监测 , 网页截屏 ,以及 无界面测试 等。
# 下载地址http://phantomjs.org/download.html# 快速入门http://phantomjs.org/quick-start.html
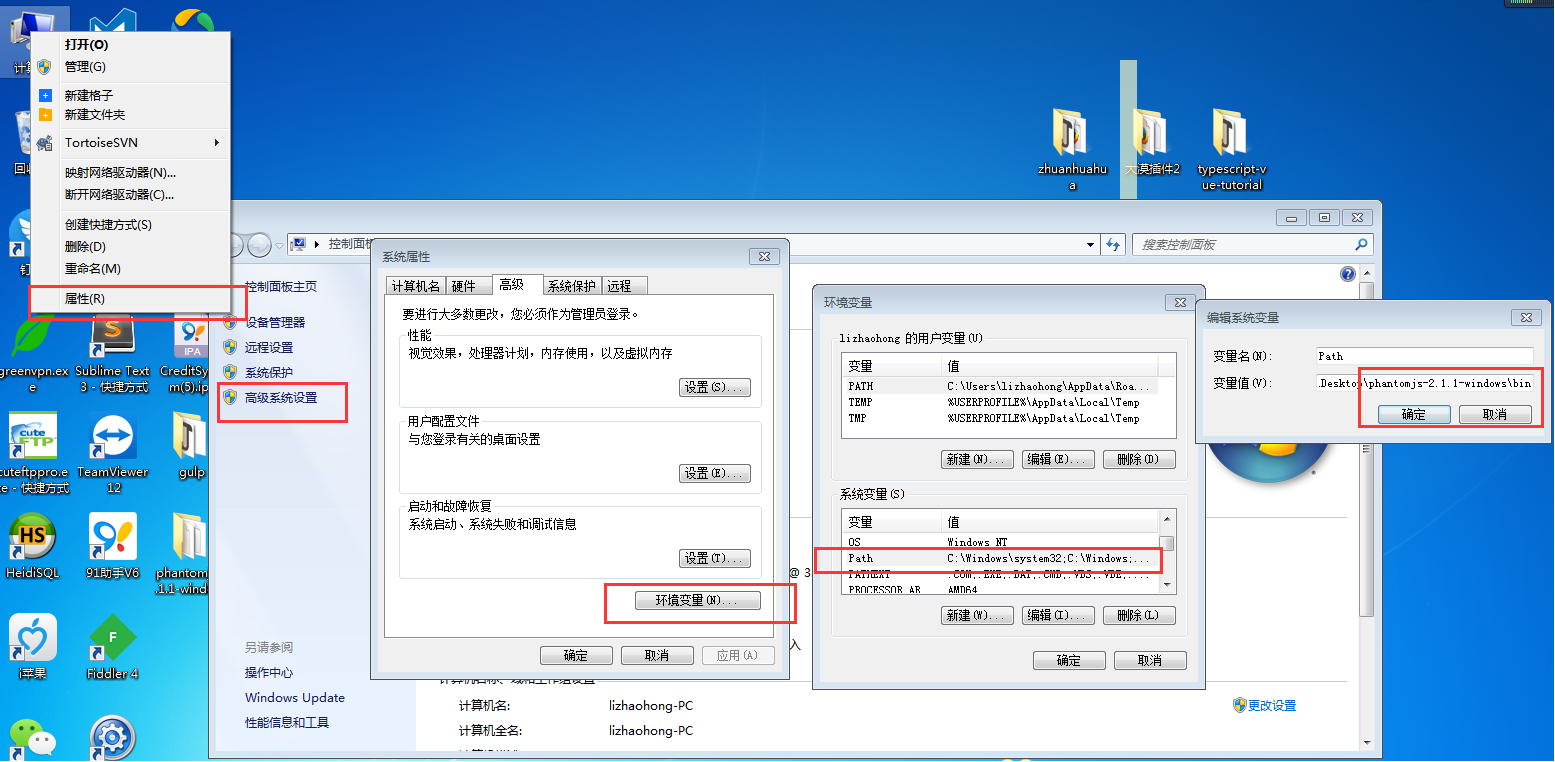
下载解压之后,将 文件目录/bin/phantomjs.exe 加入到全局环境中

新建一个hello.js文件,输入以下代码:
console.log('Hello, world!');phantom.exit(); 输入命令行:
phantom hello.js
可以看到结果正常输出了: Hello, world!
再进一步看一个惊艳的效果,修改Js文件代码:
/*console.log('Hello, world!');phantom.exit();*/var page = require('webpage').create();page.open('http://www.baidu.com', function(status) { console.log("Status: " + status); if(status === "success") { page.render('example.png'); } phantom.exit();}); 这段代码的作用是打开baidu并且截图。可以在目录下发现一个example.png图片:

碉堡了有木有!!!
再来简单学一下入参
var page = require('webpage').create(), system = require('system'), t, address;if (system.args.length === 1) { console.log('Usage: loadspeed.js '); phantom.exit();}t = Date.now();address = system.args[1];page.open(address, function(status) { if (status !== 'success') { console.log('FAIL to load the address'); } else { t = Date.now() - t; console.log('Loading ' + system.args[1]); console.log('Loading time ' + t + ' msec'); } phantom.exit();});
命令行中输入:
phantomjs hello.js http://www.baidu.com
返回结果:
Loading http://www.baidu.com
Loading time 4157 msec
dom操作
var page = require('webpage').create();var url = 'http://www.baidu.com';page.open(url, function(status) { var title = page.evaluate(function() { return document.title; }); console.log('Page title is ' + title); phantom.exit();});
监听页面的控制台console输出
var page = require('webpage').create();var url = 'http://www.baidu.com';page.onConsoleMessage = function(msg) { console.log('Page title is ' + msg);};page.open(url, function(status) { page.evaluate(function() { console.log(document.title); }); phantom.exit();});
mocha
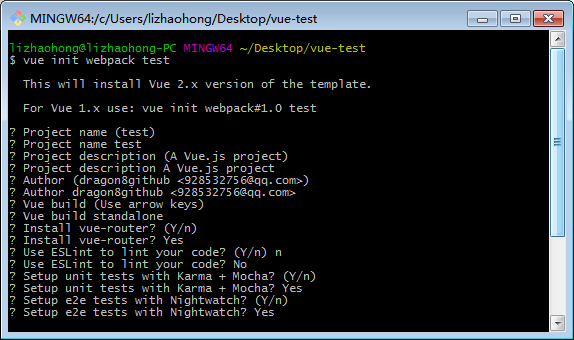
等不及了部署了,直接通过vue-cli搭建测试框架学习
# 第三方学习资源http://www.cnblogs.com/Leo_wl/p/5734889.html # 阮一峰大神的mocha资料 http://www.ruanyifeng.com/blog/2015/12/a-mocha-tutorial-of-examples.html

再使用cnpm install进行安装。然后就可以开始测试了
查看目录/test/unit/specs/Hello.spec.js。并加入一些学习代码
import Vue from 'vue'import Hello from '@/components/Hello'describe('Hello.vue', () => { it('should render correct contents', () => { const Constructor = Vue.extend(Hello) const vm = new Constructor().$mount() expect(vm.$el.querySelector('.hello h1').textContent) .to.equal('Welcome to Your Vue.js App') })})describe('Array', () => { var expectTarget = [] // it用于创建实际的测试,它在TDD中被成为测试用例(Test-Case).其第一个参数就是对该测试的描述,且该描述的语言应该是我们的日常用于的句式(而非编程语言)。 // 测试用例用it作为函数名,其用意就是希望通过程序引导开发人员用书面的语言去描述测试哟用例的作用。 // 如:'It should be done with ...' 或者 'It should be have some value'等。 // 直接翻译成中国话就是:"这里应该输出XXX结果" 或者 '这里应该完成XXX操作'这样的句式 // 这是偏向行为式的描述方式 it('这个数组的长度应该为0', () => { var arr = [] expect(arr).to.be.lengthOf(0) }) // 单元测试的对象是某个特定的类或者模板,因此describe内才直接用类名进行描述,那么it内最佳的方式应该是【方法名】或者【属性名】 it('#slice', () => { }) it('#join', () => { }) beforeEach(() => { expectTarget.push(1) }); afterEach(() => { expectTarget = [] }) it('索引为0的位置应该是一个值为1的整数', () => { expect(expectTarget[0]).to.eqls(1) }); it('可以有多个期待值检测', () => { expect(expectTarget[0]).to.eqls(1) expect(true).to.eqls(true) });})// 也就是说,// 当测试用例用于测试指定的方法或属性效果时,用“#+成员名”来方式命名// 当测试用例的测试内容不能归属某个方法或者属成员时,用“这里应该输出XXX结果”的句式陈述// 当我们希望跳过某个功能测试的时候,可以使用Xdescribe或Xit来跳过。// describe是可以嵌套的/** * beforeEach - 在每个场景(describe)测试执行之前执行; * afterEach - 在每个场景 (describe)执行完成之后执行; * before - 在所有场景执行之前执行(仅执行一次); * after - 在所有场景执行之后执行(仅执行一次); */ 执行测试代码:npm run unit
编写vue组件测试的正确姿势 :
import Vue from 'vue'import Hello from '@/components/Hello'import MyComponent from './my-component.js'describe('component', function() { it('测试组件', () => { let msgtext = '喵了个咪' // 制作组件 Vue.component('MyComponent', MyComponent); const HtmlContainer = Vue.extend({ data () { return { text: msgtext } }, template: `
nightwatch + selenium-standalone
# 优秀的第三方教程:搭建自己的前端自动化测试脚手架(一) https://segmentfault.com/a/1190000005991670 # 该教程的资源github下载 https://github.com/LancerComet/Aniber # selenium-standalone github地址 https://github.com/vvo/selenium-standalone # nightwatch官网 http://nightwatchjs.org/ # nightwatch API http://nightwatchjs.org/api#protocol